
Creating A Simple Amplify App
You’d think that creating a simple Amplify app would be, well, simple. Turns out it is not as simple as you’d think. After several false starts, I am back at it again with more public notes on trying to get an Amplify app running on the first go. While I’ve been able to push, pull, and twist several prior attempts and give birth to a functional rudimentary React web app with share data stores, it has been anything but a direct path. Like many other technology stacks these day the path is riddled with false information barfed out of every nook-and-cranny on the Internet INCLUDING Amazon’s own “support documentation” and getting started pages.
There really is an epidemic of outdated information, misinformed hacks pretending to be experts on subject matter, and just plan shit documentation all over the Internet. That is a problem I’m not about to solve today. The goal here is to get a React web app with persistent data stores up-and-running in as few steps as possible.
Following in many of my other “tech notes” formats, this will be a half-edited, half brain-dump style post. My working papers, if you will.
This post will be largely based on prior work from earlier this week noted here:
https://blog.lancecleveland.com/2023/01/22/creating-an-amplify-app-with-persistent-data/
The Environment
A little background on my environment before I get started so you can follow along. Those with different tech stacks may yield different results. My environment includes:
- MacOS Ventura 13.1
- MacBook M1 Pro , 16-inch 2021 model
- Webstorm 2022.3.1
The Process
Create a new empty project in Webstorm named “atest”. NO project type. Just a clean empty directory.
Since I’ve done this a few times before I probably do not need to run this command:
npm install -g @aws-amplify/cliSure enough, this command shows me that amplify is good-to-go, and for good measure let’s check the version:
which amplify
amplify --version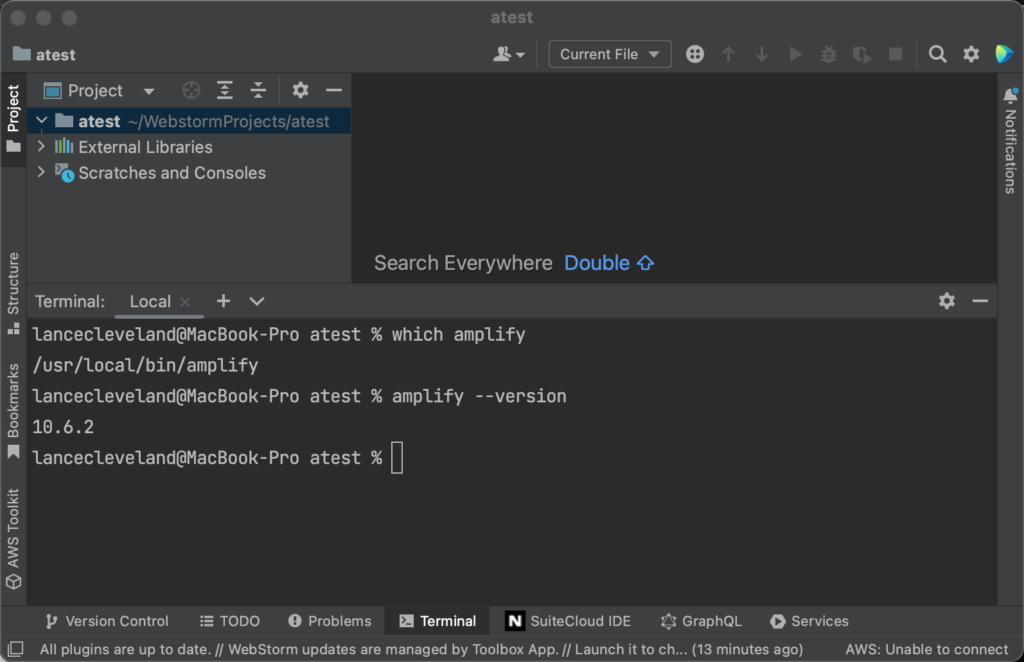
Cool, cool. Now let’s go bootstrap a React App skeleton…
npx create-react-app atest-datastore --use-npmAnd in typical node fashion if barfed out tons of code files onto my local drive, literally thousands of mini scripts many with their own little problems downloaded straight from the Internet. But it seems to have done its part.
Now to wreak some AWS Amplify havoc all up in this codebase…
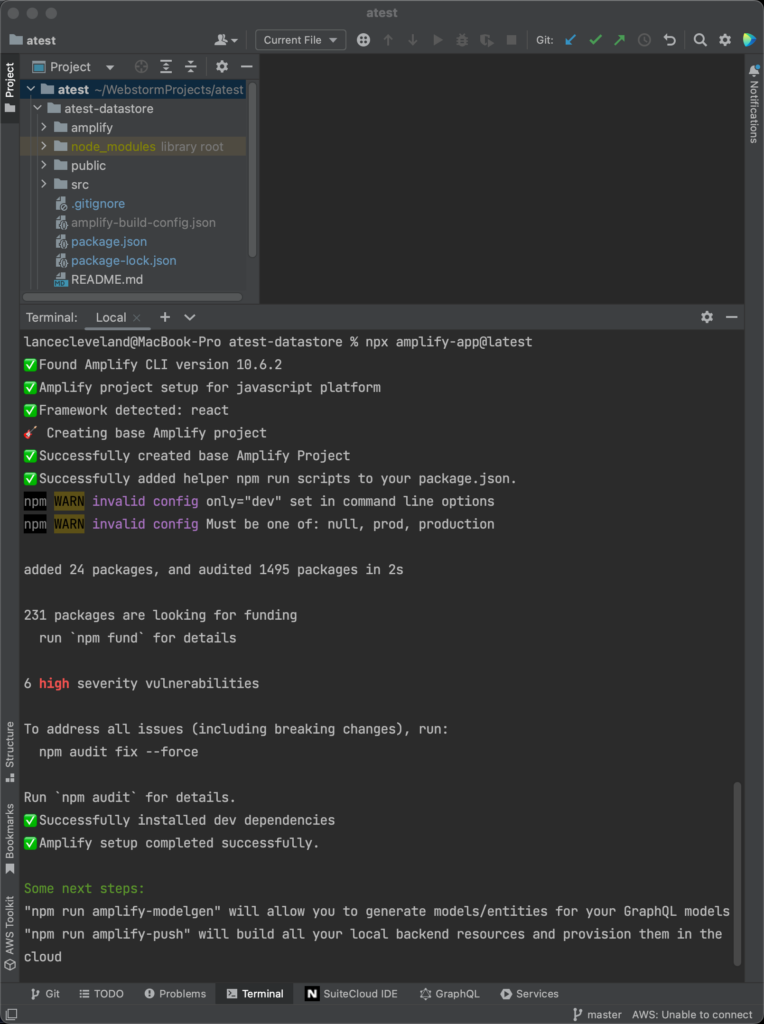
cd atest-datastore
npx amplify-app@latest
A few minutes and 24 more JavaScript files later, because Lord knows 1,495 files is not nearly enough to generate a simple web form applet… and we have more code goodness to break.
Ah, yes, and look here… buried in the downloaded files is a GraphSQL Schema file: amplify/backend/api/amplifyDatasource/schema.graphql
This is where the data model lives for our app. Since the latest version of Amplify seems to be guiding us toward a simple ToDO list example, let’s go find that “Getting Started” nugget over in the AWS docs. I know I’ve seen that somewhere.
Ah yes, and here is a hint to the “ToDo App” in the main Amplify Getting Started with JavaScript pages.
Let’s try to follow along with that one…
amplify consoleThis command will fire up a browser window and ask you to login to your AWS account. After logging in via the browser to the an admin priv’ed AWS user (root equivalent), come back to the command prompt.
Answer some prompts:
- Region: us-east-1
- IAM User: amplify-2NtRW (let’s go with their default)
Back in the browser in IAM mode it quickly fires up a window with that user code and then a new window asking for a username. Let’s keep the username the same cray amplify-gibberish name as above. DO NOT check console access.
Now the browser window wants to Set Permissions. While I could use the pre-existing ‘react-amplify-apps’ group which I know has a lot of extra permissions from a prior attempt, let’s start from scratch just to up-the-ante a bit.
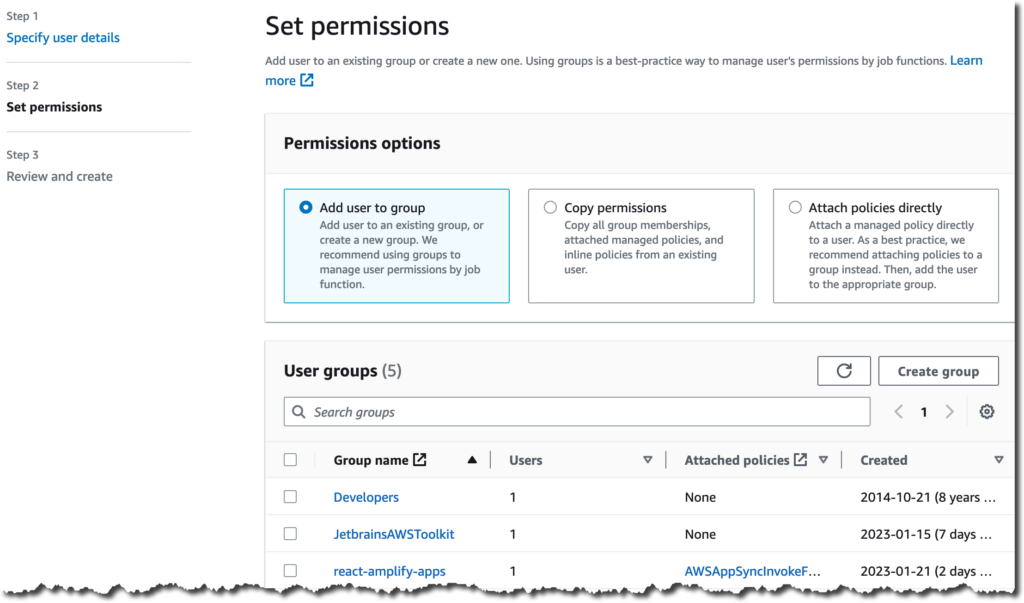
Let’s choose “Attach policies directly”.
Based on the vid on the Getting Started link from the AWS docs above, this one looks about right:

Check it off, create user and continue back in the IDE terminal window.
Now it is asking for an access key. Let’s go back to the IAM window in the browser and create an access key.
UNLIKE the video and Getting Started documentation, we were never prompted or shown an access key — this is the typical bullshit where the docs are not kept up-to-date with the latest tech. Either that or I’m missing steps and not following along properly. I give the odds 50/50 on which one it is.
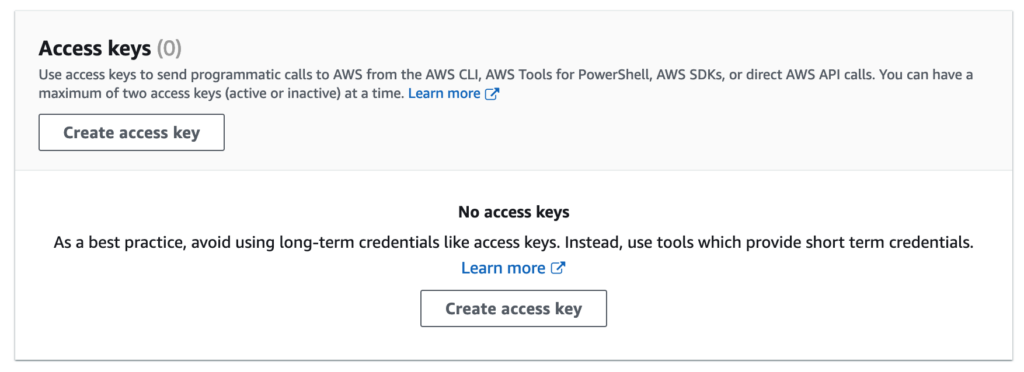
Let’s go to our AIM user and find Security and add some keys.
Ok, so this is interesting… while the Getting Started guide and the amplify console command appear to want long-term access keys, the damn Security Credentials right in the IAM user setup recommends to NOT do that. More conflicting information.
The crazy part is if you go to my notes from the other day, using those steps it auto-creates the user connection and generates a short-lived access key automatically via the amplify CLI.
Maybe we should have used amplify init instead of amplify console commands. Good thing the Amplify CLI is so well documented, and by well documented I mean barely documented anywhere I can find online. From what I could find there is not even a current list of CLI commands with a description of what they do anywhere online. Anyway…
Let’s ignore that advice and go ahead and create an access key for this user.
More choices…
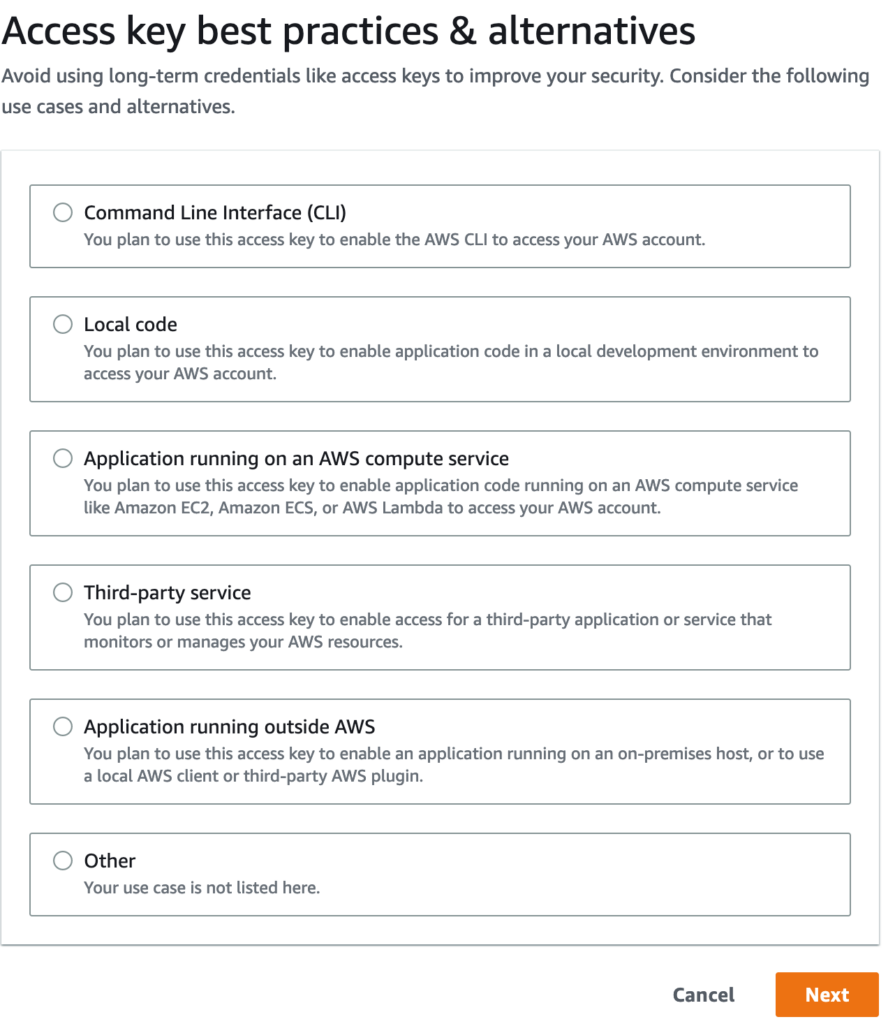
Hmmm… since the docs do not match the UX, let’s just guess here. Let’s go with local code just for fun.
Oh good, more warnings:
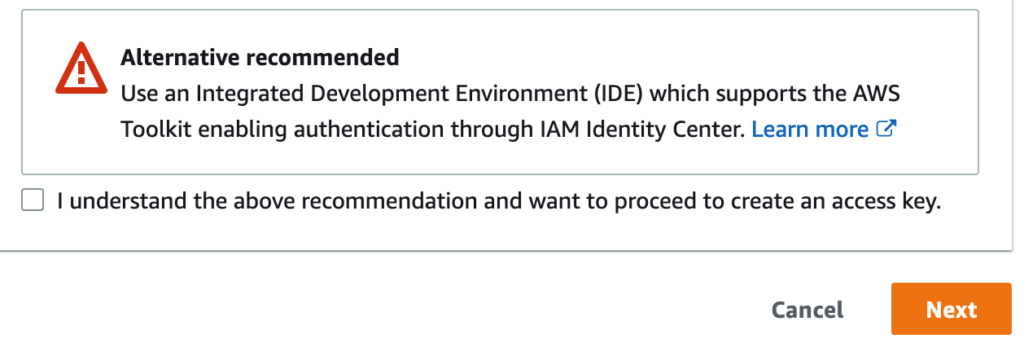
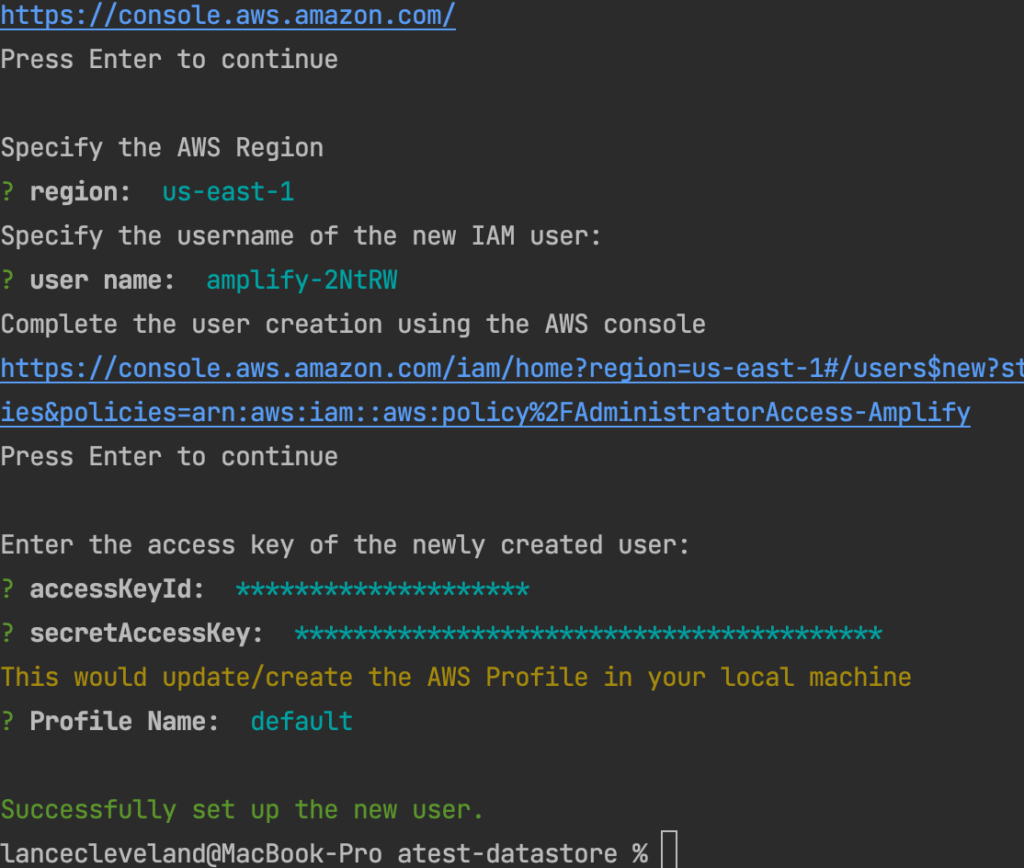
Cool, an access key and secret key. Let’s snarf both of those because I am damn sure the CLI amplify console command is going to ask for those.
Yup.. paste and paste and enter to choose default.
T=
Well That’s A Shit Show
Guess we should not have started with one tutorial then jumped to another. The next steps in the Getting Started from above have us setting up webpack and touching source files and editing package.json to add build and start scripts.
But guess what… the create-react-app already does all that in one easy-to-use package thanks to the create React app “craco” goodness. Hmmm.. let’s just skip a bunch of this and work back toward the other dev notes.
Let’s skip forward, or backward a step
Ok, well let’s just stop there and back up a step. In the notes from yesterday we modified our model and ran amplify init pretty early in the process. In the new getting started guide on AWS they do all that extra web pack stuff and manual React setup crap. Let’s just jump to the init and we will go hack our React applet later.
I’m guessing there will a third streamlined process article coming later this week. My guess is we will go ahead and create an IAM user specifically for our app and add the Amplify Admin permission policies to that IAM user then use this amplify init step to connect our app via the amplify CLI to that user and let the CLI manage the keys. Sort of a hybrid between the two non-functional getting started examples provided by Amazon.
amplify initThe prompts:
- Environment: dev
- Editor: IntelliJ IDEA
- Use profile: react-amplified (it must be pulling this form the IAM user list with users starting with amplify-)
Let’s check this out:
amplify status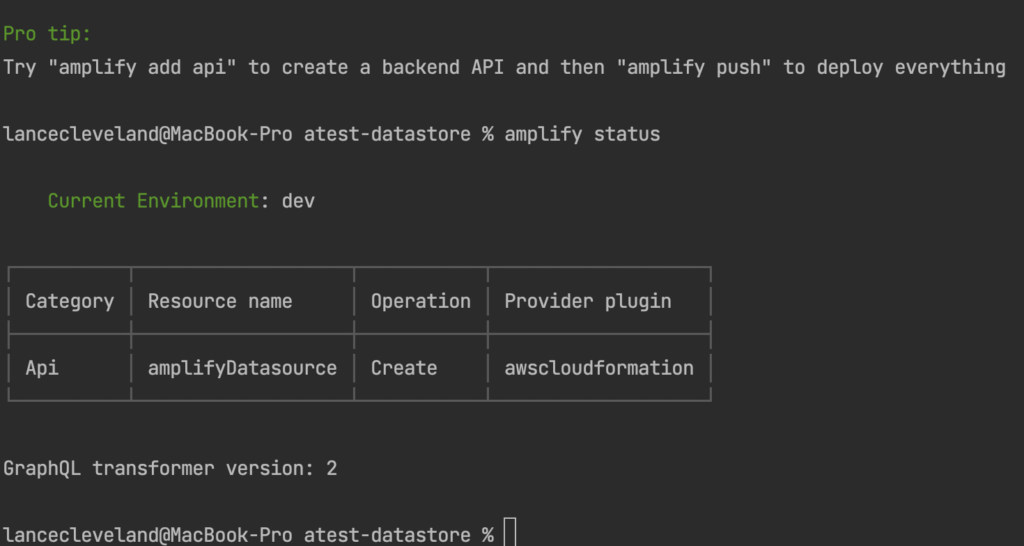
OK — so let’s generate our models for our code then do the pro tips amplify add api and amplify push as noted above.
npm run amplify-modelgen
amplify add api
The prompts:
- Service: GraphQL
Oh — we apparently already have the API ADDED , probably what the amplify status command was telling us…
Sure enough, going back to the web window (AWS login) and looking at amplify we have an atest-datastore for a backend.
amplify update api- Service: GraphQL
- Migrate: yes
- Modify: select auth modes , API key, add a description and set to expire in 90 days
It was good to do that and set a key with an expiration, but very likely unnecessary to get this working.
amplify push- Are you sure? Y
- Generate code? Y , JavaScript
- File pattern? (default)
- Generate/update all? Y (default)
- Max nested? 2 (default)
Now the CLI goes out to the Amplify stack and starts creating an generating a bunch of stuff. Things like a DynamoDB, Appsyn setup and other cool features. But our app code is still a generic create React app template. It is notable in the App.js code in the src directory. Let’s go snarf some code for the Getting Started guide.
The Code Hackery
Add some libs we will need, antd for a simple React UI framework, and some amplify modules for data I/O.
npm install antd aws-amplify @aws-amplify/core @aws-amplify/datastoreThis will update the package.json so anyone pulling down the app via git can just run npm install and get all the extra JavaScript goodness.
index.js
import React from 'react';
import ReactDOM from 'react-dom/client';
import './index.css';
import App from './App';

import {Amplify} from "@aws-amplify/core";
import config from './aws-exports';
Amplify.configure(config);

const root = ReactDOM.createRoot(document.getElementById('root'));
root.render(
    <React.StrictMode>
        <App />
    </React.StrictMode>
);
App.js
// React Libs
import React, {useState, useEffect} from 'react'

// AWS Libs
import {API, graphqlOperation} from "aws-amplify"
import {DataStore} from "@aws-amplify/datastore"

// Ant Design UI Framework
import {Input, Button} from "antd"

// GraphQL Helpers
import {Task} from './models';
import {createTask} from "./graphql/mutations"
import {listTasks} from "./graphql/queries"

//import {onCreateTodo} from "./graphql/subscriptions";

// async function createNewTodo() {
//     const todo = {
//         name: "Use AppSync",
//         description: `Realtime and Offline (${new Date().toLocaleString()})`,
//     };
//
//     return await API.graphql(graphqlOperation(createTodo, {input: todo}));
// }

// const MutationButton = document.getElementById("MutationEventButton");
// const MutationResult = document.getElementById("MutationResult");
// const QueryResult = document.getElementById("QueryResult");
// const SubscriptionResult = document.getElementById("SubscriptionResult");
//
// MutationButton.addEventListener("click", (evt) => {
//     createNewTodo().then((evt) => {
//         MutationResult.innerHTML += `<p>${evt.data.createTodo.name} - ${evt.data.createTodo.description}</p>`;
//     });
// });
//
// API.graphql(graphqlOperation(onCreateTodo)).subscribe({
//     next: (evt) => {
//         const todo = evt.value.data.onCreateTodo;
//         SubscriptionResult.innerHTML += `<p>${todo.name} - ${todo.description}</p>`;
//     },
// });

const initialState = { title: '' };

function App() {
    const [tasks, updateTask] = useState([])
    const [formState, updateFormState] = useState(initialState)

    async function getData() {
        const tasks = await API.graphql(graphqlOperation(listTasks));
        updateTask(tasks);
    }

    useEffect(() => {
        getData()
        const subscription = DataStore.observe(Task).subscribe(()=>getData())
        return () => subscription.unsubscribe();
    });

    function onChange(e) {
        updateFormState({ ...formState, title: e.target.value})
    }

    async function addTask() {
        if (!formState.title) return
        await API.graphql(graphqlOperation(createTask, {input: formState}));
        updateFormState(initialState)
    }

    return (
        <div style={container}>
            <h1>Tasks</h1>
            <Input
                onChange={onChange}
                name='task'
                placeholder='Task'
                value={formState.title}
            />
            <Button type='primary' onClick={addTask}>Add</Button>
            {
                tasks.map(task => (
                    <div key={task.id}>
                        <div>
                            <p>{task.title}</p>
                        </div>
                    </div>
                ))
            }
        </div>
    );
}

const container = { width: '100%', padding: 40, maxWidth: 900 }

export default App