
Building A Shopify App : Getting Started
Shopify provides a full development platform that allows developers to create custom apps that appear in the Shopify App Store. Our goal is to start building a Shopify app version of Store Locator Plus® to provide a native Shopify user experience (UX) for our locator map and directory platform. These are my dev notes from the initial attempt to get a rudimentary app up-and-running.
Dev Environment
My development environment includes Webstorm v2022.3.1 running on MacOS Venture 13.1 on a 2021 MacBook Pro.
You’ll need to have your Node environment already installed on your laptop. Our environment includes node v18.12.0 and npm v9.2.0. On a Macbook use brew to install node and npm.
You’ll also need to sign up for a Shopify Partners account.
Getting Started
The dev library for this project will be in Node (JavaScript).
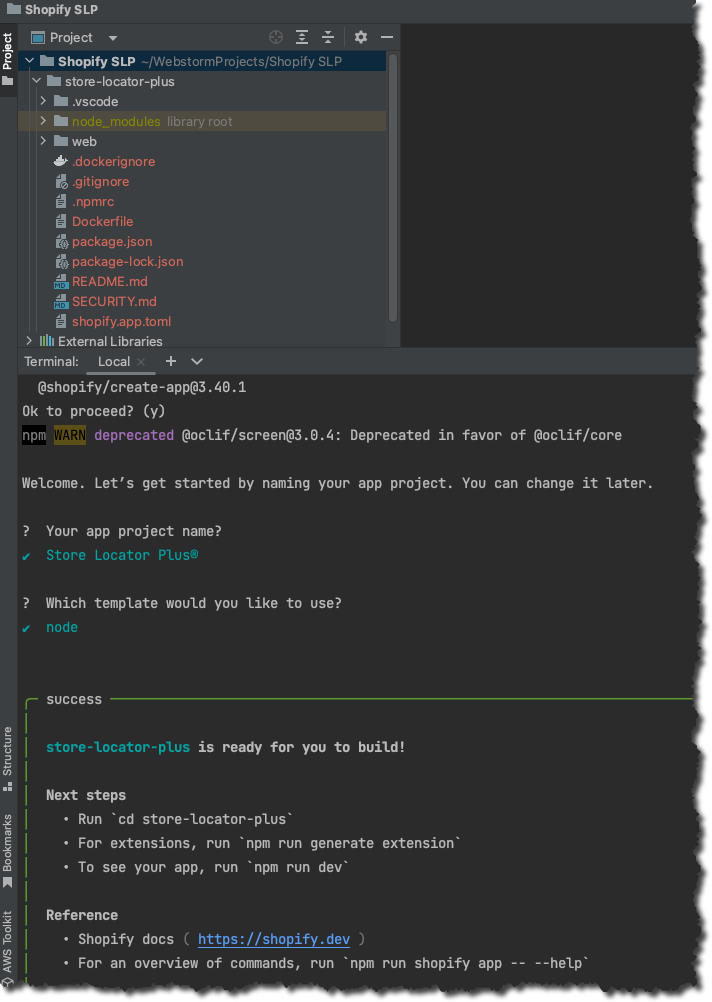
Create a new project in Webstorm , which creates the directory. For this example I’ve selected: “Shopify SLP” which creates a folder with that name in the Webstorm projects directory.
Time to init the Node project using the latest Shopify app script. Open a terminal window in Webstorm and type the following:
npm init @shopify/app@latest

>> App name: Store Locator Plus
This creates a subdirectory ./store-locator-plus
Give your app a name and select “node” as the environment.
cd ./store-locatorplus

npm run dev

>> This opens a browser page to login to your Shopify dev account.
After logging in and authenticating your partner/developer account you’ll need to answer a few more questions and setup a tunnel to Shopify via ngrok.
The script will prompt you for an ngrok token via the terminal interface. Follow the link to get a ngrok token via the terminal link (or click the link in this post). Go to “Your Auth Token” at ngrok , copy and paste it back in the terminal window where prompted.
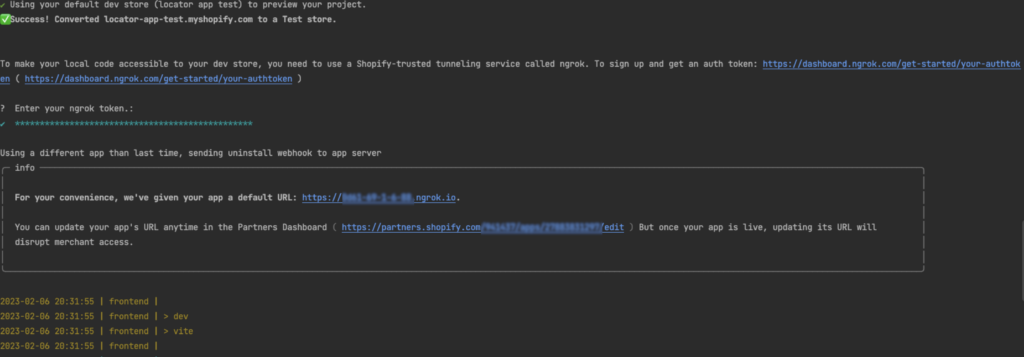
When this is done setting up the tunnel, follow the PREVIEW link at the end of the terminal output:

You should get a screen similar to this in your browser (this is the smaller footprint Mobile version, you may see sidebar menus and more text).
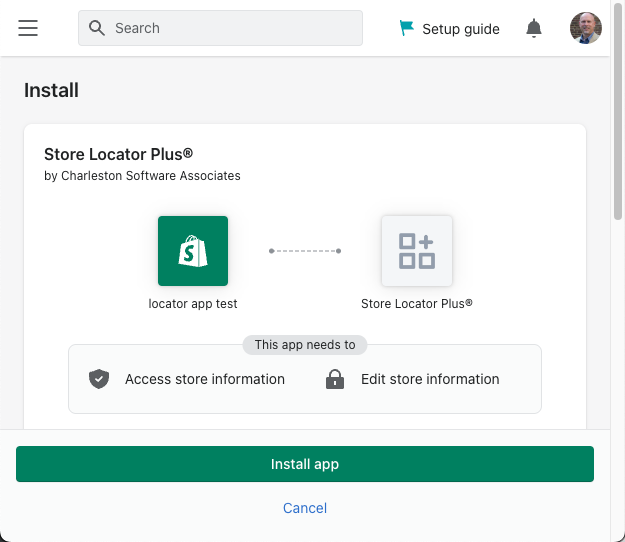
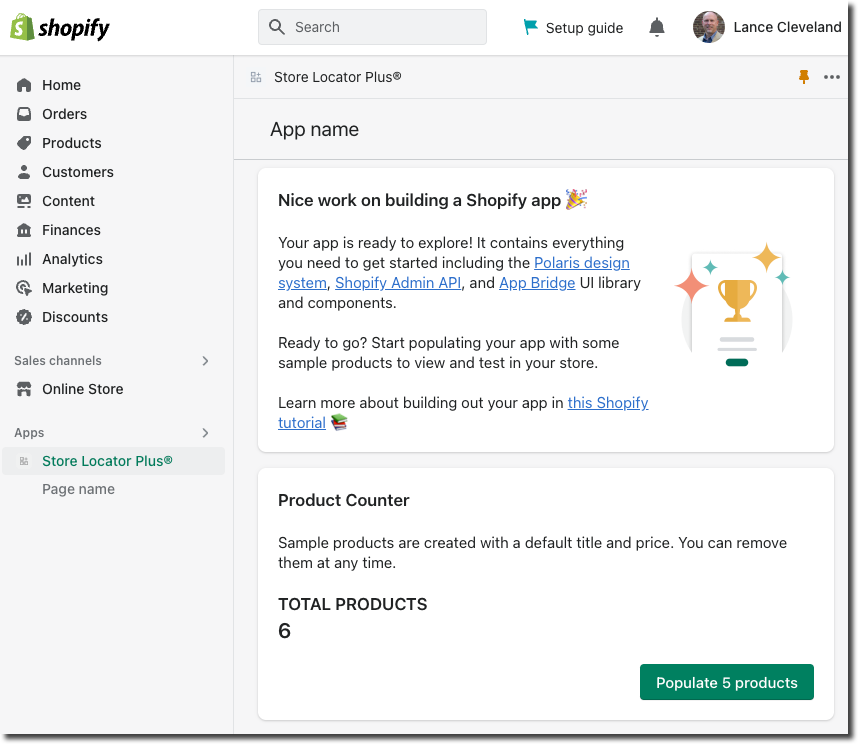
This will install the app on the test store Shopify has setup for you on your account. It will appear in the sidebar of the test store under apps.
Click the app to see the front page dashboard. Click “Populate 5 Products” and it will add 5 new products to your store.
In my next blog post I’ll be diving into how to modify the app to change the front end components, with a target agenda of connecting to the Store Locator Plus® Saas platform.
Did I missing something related to building a Shopify App? Have something to add to the conversation? Let me know in the comments below.