Selenium Web App Test: Are My Web Parts There?
As per my previous articles, I am building new test cases using Selenium as a replacement for my older Selenium IDE tests. Selenium IDE is no longer supported by Firefox 55+ and the next generation doesn’t appear as though it will be ready any time soon. If you are going to continue testing your web apps with Selenium, now is the time to learn Webdriver.
This is a continuation of the Selenium automated web testing series. You can use Selenium to automate testing of your web apps for quality assurance or to automate routine data entry. It is a great way to write “code bots” to make them do all the repetitive tasks for your app.
My Environment
I’ve setup my MacOS box to run automated testing with Safari which is driven by a Node.js app. Since automation is built into Safari since version 10 this makes the simpler than having to find/build/install browser drivers for things like Chrome, Firefox, or IE however once you do so the remaining script coding should be the same.
You’ll want to find my prior article on setting up the environment to ensure you have Node.js installed with the relevant Selenium drivers. In my test cases I have a directory with a webdriver_tests sudirectory where my test scripts live and a node_module subdirectory where node has installed all the libraries for running the node app. I also run my testing through phpStorm as I prefer the smart completion and live syntax checking when writing code. You can run your tests from any JavaScript aware IDE or from the command line using the node command to run your script.
Test Objective
In this test I want to open my target website URL and check to see critical elements are present. I will also interact with one of the elements and to prepare further testing where I will later build an automated new user sign up test module.
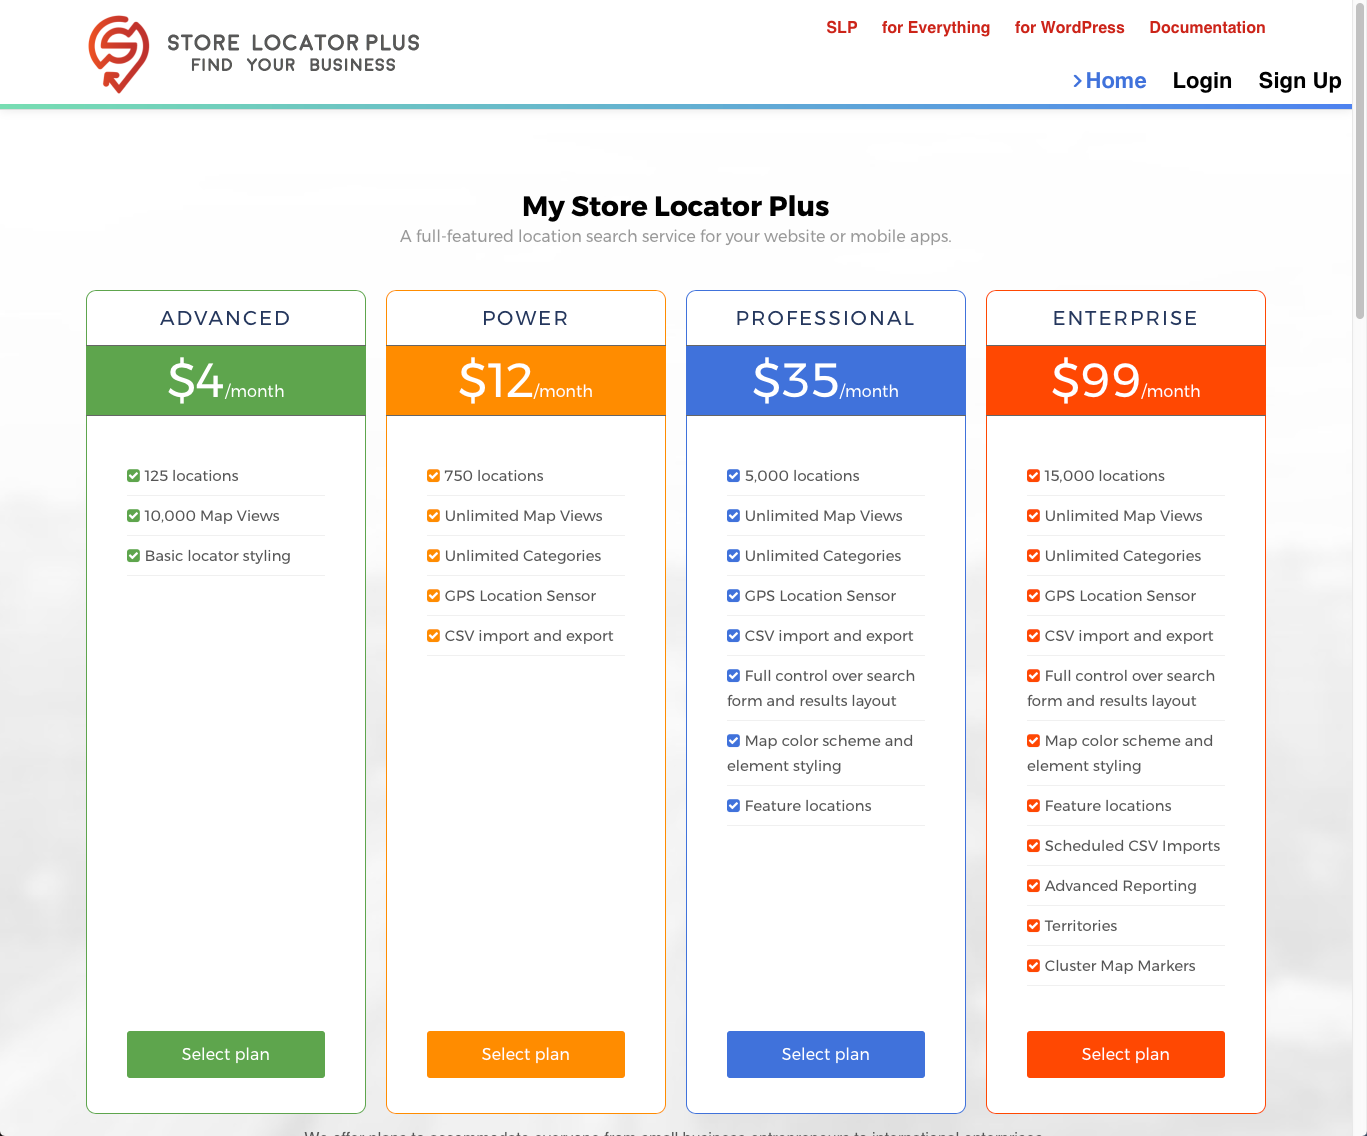
In this case our MySLP service has 4 different offerings that behind-the-scenes have been assigned the green, yellow, blue, and orange service levels. We will test that all 4 offerings have their respective divs renedered on the home page with a primary button the user can click to sign up. Later tests we can add things like “make sure this text label is present” but we’ll leave that out for now.

In case you are wondering, abstrating by colors allows us to later change the name of the services without having to change lots of back end code or testing scripts.
The Script
As before I will start with the entire script so you can see high-level view then I’ll drill down into various components and shares notes on what they do. You may also want to keep tabs on this as I’ve been finding that despite the strength of the testing tool itself, the Selenium documentation as a whole is horrific. You almost need a phd in computer science just to figure out how to use it effectively.
/**
 * Test environment variables.
 */
var myslp_config = {
    'production_url' : 'https://my.storelocatorplus.com',
    'staging_url' : 'https://mybeta.storelocatorplus.com',
};

/**
 * The browser configuration.
 *
 * browserName: 'chrome', 'firefox', 'ie', 'safari'
 *
 * @type {{browserName: string, download: boolean}}
 */
var browser_config = {
    browserName: 'safari',
        download: true
};

/**
 * @type {WebDriver} driver
 */
var driver;


/**
 * Load our libraries.
 */
var seleniumDrivers = require('selenium-drivers');      // load the selenium lib
const {Builder, By, until} = require('selenium-webdriver');

/**
 * Utilities
 */
var my_utils = ( function() {
    var all_tests_passed = true;

    /**
     * The log missing item utility.
     *
     * @param err
     */
    this.log_missing_item = function( err ) {
        console.log( '[error] A piece of this web app that we expected to find has gone missing.' );
        all_tests_passed = false;
    }

    /**
     * Report all tests state.
     *
     * @param label
     */
    this.report_on_all_tests = function( label ) {
        if ( all_tests_passed ) {
            console.log( label + ' [ passed ] ');
        } else {
            console.log( label + ' [ FAILED ] ');
        }

        console.log( "\r\n" );
    }

    // Expose the utils we want public.
    return {
        log_missing_item: log_missing_item,
        report_on_all_tests: report_on_all_tests
    }

} )();


/**
 * Test the home page content.
 */
var myslp_home_content = function() {

    driver.get( myslp_config.staging_url )

        // All 4 Plan Section Exist
        .then(_ => driver.findElement(By.xpath('//div[@class="price-tables"]//div[contains(@class,"green"   )]')).then( null, my_utils.log_missing_item ) )
        .then(_ => driver.findElement(By.xpath('//div[@class="price-tables"]//div[contains(@class,"yellow"  )]')).then( null, my_utils.log_missing_item ) )
        .then(_ => driver.findElement(By.xpath('//div[@class="price-tables"]//div[contains(@class,"blue"    )]')).then( null, my_utils.log_missing_item ) )
        .then(_ => driver.findElement(By.xpath('//div[@class="price-tables"]//div[contains(@class,"orange"  )]')).then( null, my_utils.log_missing_item ) )

        // All 4 select plan buttons exist
        .then(_ => driver.findElement(By.xpath('//div[@class="price-tables"]//div[contains(@class,"green"   )]//a[contains(@class,"pt-button")]')).then( null, my_utils.log_missing_item ) )
        .then(_ => driver.findElement(By.xpath('//div[@class="price-tables"]//div[contains(@class,"yellow"  )]//a[contains(@class,"pt-button")]')).then( null, my_utils.log_missing_item ) )
        .then(_ => driver.findElement(By.xpath('//div[@class="price-tables"]//div[contains(@class,"blue"    )]//a[contains(@class,"pt-button")]')).then( null, my_utils.log_missing_item ) )

        // Report full test results
        .then(_ => my_utils.report_on_all_tests( 'Home Content' ) )

    ;

};

/**
 * Sign up for a plan.
 * @param plan
 */
var myslp_signup = function( plan ) {
    var plan_div = '//div[@class="price-tables"]//div[contains(@class,"' + plan + '")]'

    driver.get( myslp_config.staging_url )
        .then(_ => driver.findElement(By.xpath( plan_div + '//a[contains(@class,"pt-buttonx")]' ) ).then( function( obj ) { obj.click() }, my_utils.log_missing_item ) )

        // Report full test results
        .then(_ => my_utils.report_on_all_tests( 'MySLP Sign Up' ) )
    ;
}

/**
 * Initialize the driver.
 * This is much like the jQuery document.ready() methodology.
 */
seleniumDrivers.init( browser_config ).then( function () {

    driver = new Builder()
        .forBrowser('safari') // See /node_modules/selenium-webdriver/lib/capabilities.js for list
        .build();

    console.log( "-----\r\n" );

    myslp_home_content();       // Test the home page content
    myslp_signup( 'orange' );   // Sign up for orange plan

    driver.sleep( 5000 );

});
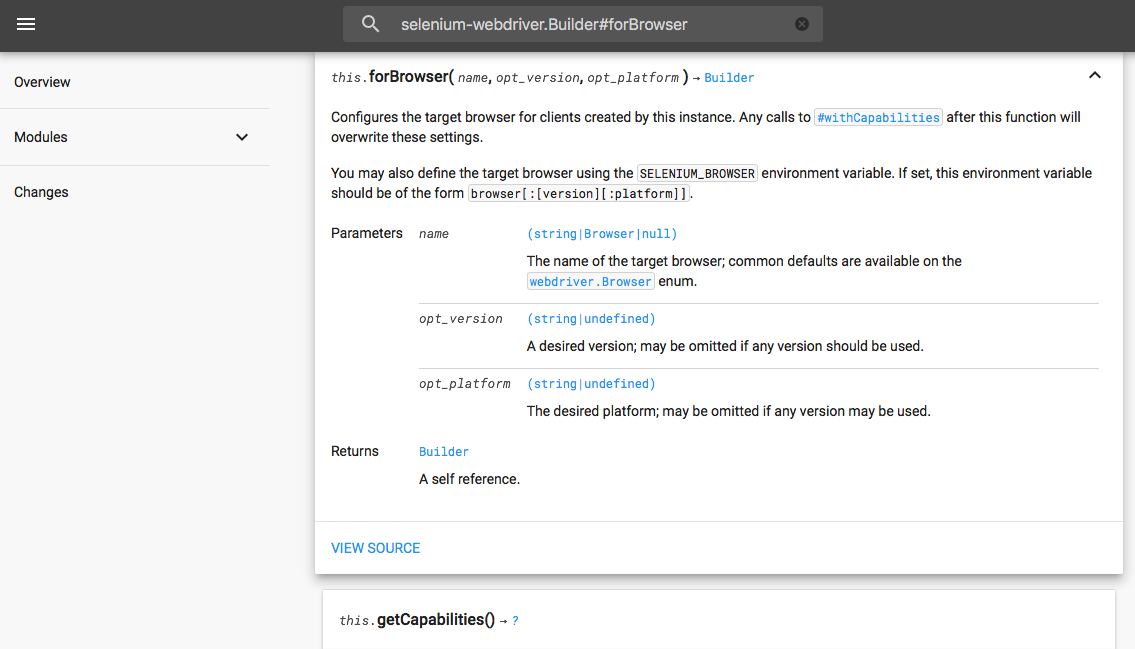
Side Note: One of the many “good luck figuring this out” documentation examples, finding what the options are on the .forBrowser() call. It simply says “The name of the target browser; common defaults are available on the webdriver.Browser enum” and leaves you to figure it out. The Browser enum lives in the capabilities.js module of the selenium-webdriver lib of node.

Here is the enum at the time of writing this article:
const Browser = {
  ANDROID: 'android',
  CHROME: 'chrome',
  EDGE: 'MicrosoftEdge',
  FIREFOX: 'firefox',
  IE: 'internet explorer',
  INTERNET_EXPLORER: 'internet explorer',
  IPAD: 'iPad',
  IPHONE: 'iPhone',
  OPERA: 'opera',
  PHANTOM_JS: 'phantomjs',
  SAFARI: 'safari',
  HTMLUNIT: 'htmlunit'
};
The Setup and Execution
The first part of the script and “launch” part of the script have been covered in previous articles. We setup the configuration and use the seleniumDrivers.init() to launch it when everything is ready. I won’t get into the details here.
The Home Content Test
The first test we run is to check the home page content is there. It opens the web page with the Selenium Driver get() method and strings along a series of FindElement() methods to test things are as we expect them.
/**
 * Test the home page content.
 */
var myslp_home_content = function() {

    driver.get( myslp_config.staging_url )

        // All 4 Plan Section Exist
        .then(_ => driver.findElement(By.xpath('//div[@class="price-tables"]//div[contains(@class,"green"   )]')).then( null, my_utils.log_missing_item ) )
        .then(_ => driver.findElement(By.xpath('//div[@class="price-tables"]//div[contains(@class,"yellow"  )]')).then( null, my_utils.log_missing_item ) )
        .then(_ => driver.findElement(By.xpath('//div[@class="price-tables"]//div[contains(@class,"blue"    )]')).then( null, my_utils.log_missing_item ) )
        .then(_ => driver.findElement(By.xpath('//div[@class="price-tables"]//div[contains(@class,"orange"  )]')).then( null, my_utils.log_missing_item ) )

        // All 4 select plan buttons exist
        .then(_ => driver.findElement(By.xpath('//div[@class="price-tables"]//div[contains(@class,"green"   )]//a[contains(@class,"pt-button")]')).then( null, my_utils.log_missing_item ) )
        .then(_ => driver.findElement(By.xpath('//div[@class="price-tables"]//div[contains(@class,"yellow"  )]//a[contains(@class,"pt-button")]')).then( null, my_utils.log_missing_item ) )
        .then(_ => driver.findElement(By.xpath('//div[@class="price-tables"]//div[contains(@class,"blue"    )]//a[contains(@class,"pt-button")]')).then( null, my_utils.log_missing_item ) )

        // Report full test results
        .then(_ => my_utils.report_on_all_tests( 'Home Content' ) )

    ;

};
I am using the By.xpath() method to locate elements by their xpath. This allows me to string along HTML dependencies like “find the div for the orange class that is INSIDE the div with the price-tables class”. This is helpful when HTML elements that need to be tested do not have unique classes or IDs.
What is with all the .then() calls?
You’ll want to read a about the Promise construct in JavaScript. It allows us to launch commands and let them finish “whenever they are done”. Like finding a page element. .then() is a construct that says “when you are done go do this next”. By stringing together a bunch of .then() methods we can basically turn a bunch of “find this then that” commands that finish at random times into a “do this, then do that, then do that” ordered series that behaves more like a sequential (synchronous) app.
Side note: Many things in JavaScript run asynchronously. That means stuff can happen in random order. Think of it like sending 10 people to run off and buy stuff for a party, they all leave at the same time but you have no clue who is coming back first; the guy with the burgers, the gal with the buns, or the dude with the chips.
Why make it synchronous?
For the findElement() testing I don’t really need to test they are all there in sequence. In the grander scheme of things I do want to know if ALL the tests in a group passed or failed. In order to do this you’ll see that I’m seeting a boolean in the my_utils object to track if any of the tests failed. If I were to test this after a series of independent findElement() calls it is 99.9% likely that none (and certainly not all) of the findElement() tests will have finished their work before the JavaScript engine evaluates that boolean. Setting up a list of tests to run they testing a boolean is FAR faster (some 1,000+ times) than scanning an HTML DOM.
/**
 * Utilities
 */
var my_utils = ( function() {
    var all_tests_passed = true;

    /**
     * The log missing item utility.
     *
     * @param err
     */
    this.log_missing_item = function( err ) {
        console.log( '[error] A piece of this web app that we expected to find has gone missing.' );
        all_tests_passed = false;
    }

    /**
     * Report all tests state.
     *
     * @param label
     */
    this.report_on_all_tests = function( label ) {
        if ( all_tests_passed ) {
            console.log( label + ' [ passed ] ');
        } else {
            console.log( label + ' [ FAILED ] ');
        }

        console.log( "\r\n" );
    }

    // Expose the utils we want public.
    return {
        log_missing_item: log_missing_item,
        report_on_all_tests: report_on_all_tests
    }

} )();
If you don’t believe me, comment out the last .then() test with my_utils.report_on_all_tests( ‘Home Content’ ) and move my_utils.report_on_all_tests( ‘Home Content’ ) outside the closing driver.get() call. It will run before any of the tests begin to execute.
The Signup Test
The first test, myslp_home_content(), checks our key elements are there. The second test looks for the ‘orange button’ and clicks it. For now the test is simplified and only clicks the button. It will be extended for element checking and interaction to automate the sign up process later.
Here I am showing how to interact with an element by using the .then() processor to test for 2 cases. This is slightly different than the .then() construct used to string together tests in sequence. Here I am using the default parameters of .then() which is a function to run when the promise has been fulfilled (success) and when it has not (failed).
/**
 * Sign up for a plan.
 * @param plan
 */
var myslp_signup = function( plan ) {
    var plan_div = '//div[@class="price-tables"]//div[contains(@class,"' + plan + '")]'

    driver.get( myslp_config.staging_url )
        .then(_ => driver.findElement(By.xpath( plan_div + '//a[contains(@class,"pt-buttonx")]' ) ).then( function( obj ) { obj.click() }, my_utils.log_missing_item ) )

        // Report full test results
        .then(_ => my_utils.report_on_all_tests( 'MySLP Sign Up' ) )
    ;
}
If you break it down we find an element by using its xpath. We then call the anonymous function which is passed the object we were looking for and execute the click() command on that object. If it fails we call the my_utils.log_missing_item method which logs an error and sets a flag we can later test to report back if the entire test suite worked with the my_utils.report_all_tests() method.
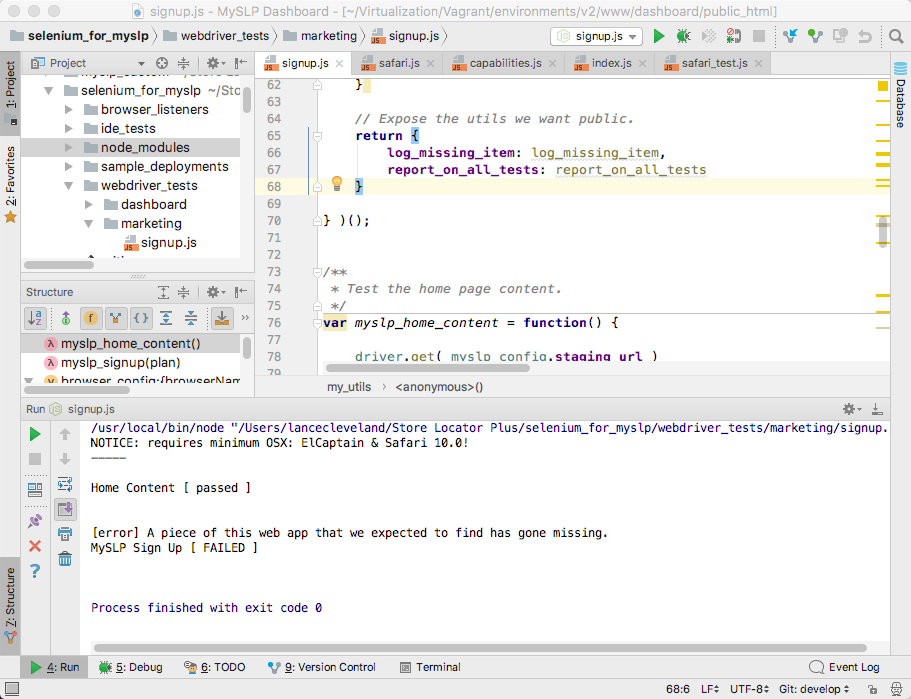
In the initial code example above you may notice I intentionally left a typo in the code looking for class “pt-buttonx” instead of “pt-button”. This is to show the output of a failed test. Fixing this will execute the button click and the test will carry on.

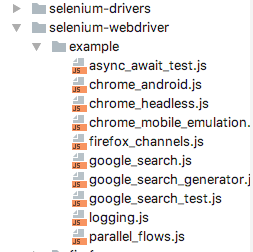
Side note: One last hint before we wrap up this example, you can learn a bit more about how Selenium Webdriver works with JavaScript by finding the “code easter egg”. Hidden in the selenium-webdriver node library is an example directory. In it you’ll find, not surprisingly, examples of some basic tests. You may even learn some new tricks in there. It is how I learned to easily string together tests and make them behave in sequence as per my example here.

