Testing Web Apps With Selenium and JavaScript
It turns out I’ve been making the setup of Selenium 2 (Selenium Server + Webdriver) far too complicated. As noted in my prior article, getting the client side of the equation setup with Safari is as simple as going to the developer menu and selecting “Allow Remote Automation”.
The server side of things is almost as easy. I’ve opted to build my tests in JavaScript since that is the “way of the web app world” these days and because it will fit in very nicely with my PHP-heavy web apps written for WordPress. That means I can keep my phpStorm environment intact and use the built-in Node, Grunt, WordPress-aware code highlighting AND run my tests from the IDE. Very nice.
For this example I am using Safari 11 (released September 2017) and adding a Node.js applet to my PHP project for testing my WordPress plugin. I’ve setup the project with source in phpStorm already so from here I just need a “home” for running the web tests.
Install Node.js
I’ve already setup Node on my MacOS box, you can do the same by downloading and installing the node package on Node.js.
Setup A Directory
I created a directory from the MacOS terminal called “selenium_for_myslp” where I have been storing my Selenium IDE tests from past testing cycles. Within this directory I I’ve created a new “webdriver_tests” directory where I will write and execute all of my new Selenium (aka Selenium 2 or Selenium + Webdriver) tests written in JavaScript using node packages.
Install The Nodes
From the command line you will need to install both the selenium-drivers and selenium-webdrivers packages. Go to your project directory and install those modules.
npm install selenium-webdriver
npm install selenium-drivers
Since I’ve not defined any package dependencies, licenses, repos, or other “overhead” for a typical Node app I see some notices about that.
npm WARN enoent ENOENT: no such file or directory, open ‘/Users/lancecleveland/Store Locator Plus/selenium_for_myslp/package.json’
npm WARN selenium_for_myslp No description
npm WARN selenium_for_myslp No repository field.
npm WARN selenium_for_myslp No README data
npm WARN selenium_for_myslp No license field.
No worries there, the testing app will run fine.
Create The Test Applet
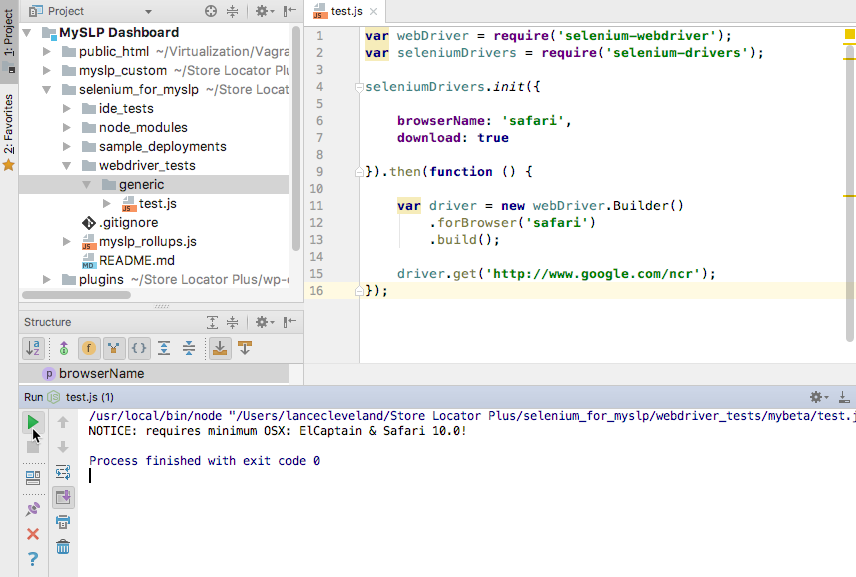
Now I get into phpStorm and add the new directory , the top-level “selenium_for_myslp” directory in my case, to my project. I see my old IDE tests, the newly-minted node_modules, my old sample_deployments, and my new webdriver_tests directories.
I’ll create a new “generic” subdirectory and in it add a new JavaScript file. I’ll call it “test.js” because it is a test.
A straight copy-paste from the selenium-drivers example, then replacing “chrome” with “safari”, and I’m in business.
var webDriver = require('selenium-webdriver');
var seleniumDrivers = require('selenium-drivers');

seleniumDrivers.init({

    browserName: 'safari',
    download: true

}).then(function () {

    var driver = new webDriver.Builder()
        .forBrowser('safari')
        .build();

    driver.get('http://www.google.com/ncr');
});
Right-click in the source window and run the code.

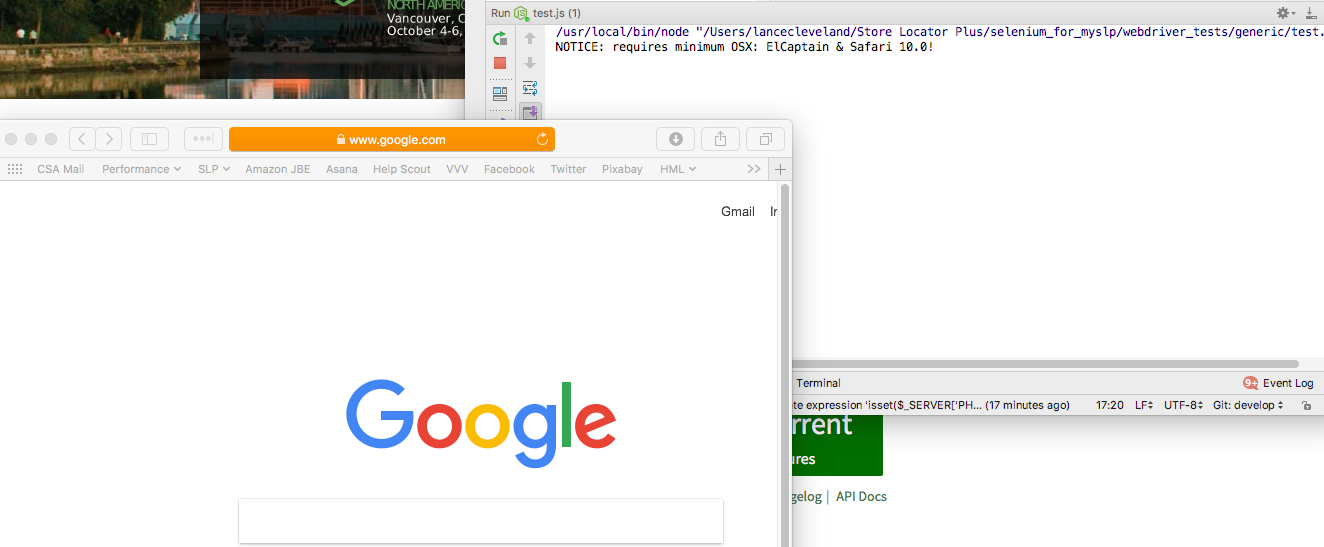
If all is well a new Safari window will fire up with a dialogue box about running automated tests. I let it run and it opens the google site in my test case.

I’m now ready to fully automate my site scripts using JavaScript and Selenium.

5 thoughts on “Testing Web Apps With Selenium and JavaScript”